Introduction
Fly fishing is an art form that combines patience, skill, and a deep connection with nature. One of the fundamental techniques in fly fishing is learning how to tie a fly, which is crucial for attracting fish with lifelike presentations. In this article, we delve into the essential steps of tying a fly, accompanied by a series of video tutorials to help you master this skill. Whether you're a beginner or looking to refine your technique, this guide will equip you with the knowledge and tools to become a proficient fly fisherman.
Understanding the Fly
Before you can tie a fly, it's important to understand its purpose. A fly is a type of artificial lure designed to mimic the appearance of natural insects, crustaceans, or other aquatic creatures. The materials used to create a fly can range from synthetic fibers to natural materials like feathers, fur, and hair.
Choosing the Right Fly
The first step in tying a fly is to choose the right pattern. Consider the type of fish you're targeting and the conditions of the water you'll be fishing in. Here are some popular fly types:
- Dry Flies: Designed to float on the surface and mimic adult insects.
- Nymphs: Designed to sink and mimic the larval stage of aquatic insects.
- Streamers: Designed to imitate swimming baitfish or larger aquatic creatures.
Gathering Your Materials
Once you've chosen a fly pattern, gather the necessary materials. Common materials include:
- Hook: The foundation of the fly, which can vary in size and shape depending on the fly pattern.
- Thread: Used to secure the materials and form the body of the fly.
- Wing Materials: Feathers, fur, or synthetic materials used to create the body or wings of the fly.
- Tail Materials: Hair, fur, or synthetic materials used to create the tail of the fly.
- Hackle: Feathers used to create the wing of a dry fly or the tail of a nymph.
- Weight: Used to help nymphs sink to the desired depth.
The Basic Steps of Tying a Fly
Select a Hook: Choose a hook that matches the size and type of fly you're tying. Insert the hook into the vise with the point facing up.
Start the Thread: Begin by wrapping the thread around the base of the hook several times to form a base for the fly.
Attach the Wing Materials: For a dry fly, you'll need to attach the wing materials. Place the wing material at the desired height and wrap the thread over it several times to secure it in place.
Attach the Tail Materials: For a nymph, you'll need to attach the tail materials. Place the tail material at the desired length and wrap the thread over it several times to secure it in place.
Attach the Hackle: For a dry fly, you'll need to attach the hackle. Place the hackle feathers at the desired height and wrap the thread over them several times to secure them in place.
Form the Body: Use the thread to form the body of the fly. This can be done by wrapping the thread around the hook shank or by using a dubbing loop.
Secure the Fly: Once the fly is formed, wrap the thread around the base of the hook to secure it. Cut the excess thread and heat it to prevent unraveling.
Trim and Shape: Trim any excess materials and shape the fly to match the desired pattern.
Video Tutorials
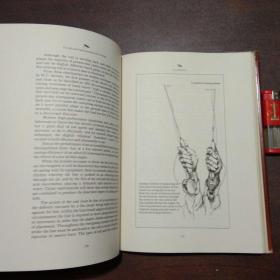
To help you visualize and understand the process, we've compiled a series of video tutorials that cover the basic steps of tying a fly. These videos will guide you through each step, from selecting the materials to completing the fly.
- Video Tutorial 1: Basic Fly Tying Techniques
- Video Tutorial 2: Tying a Dry Fly
- Video Tutorial 3: Tying a Nymph
- Video Tutorial 4: Tying a Streamer
Conclusion
Tying a fly is a skill that takes practice and patience, but with the right guidance and tools, you can master this essential technique in fly fishing. By following the steps outlined in this article and utilizing the video tutorials, you'll be well on your way to becoming a proficient fly fisherman. Remember to always respect the environment and practice ethical fishing techniques. Happy fishing!

