Content:
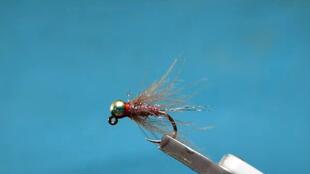
In the world of fly fishing, the skill of tying a fly to your line is as crucial as knowing where to cast. One of the most fundamental aspects of this craft is learning how to attach a float, also known as a bobber, to your fishing line. The float serves as an indicator, alerting you to when a fish has taken the bait. Mastering the technique of how to bind a float to your fishing line can significantly enhance your fishing experience. Here’s a detailed guide on the art of fly tying and how to successfully attach a float.
Understanding the Basics
Before diving into the specifics of tying a float, it’s essential to understand the components involved. The main elements are:
- Fishing Line: The main line that connects the float to the hook.
- Leader: A shorter line attached to the main line, which connects to the fly.
- Float: The buoyant object that sits on the water’s surface and helps you detect when a fish is biting.
- Hook: The pointy end that the fish will bite.
Choosing the Right Float
The first step in the process is selecting the right float for your fishing conditions. Floats come in various shapes, sizes, and densities. Consider the following factors:
- Water Depth: Deeper waters may require heavier floats, while shallow waters can handle lighter ones.
- Current: Strong currents might necessitate a float with a larger diameter to stay afloat.
- Weather Conditions: Windy conditions might call for a stiffer float to maintain its position.
Attaching the Float to the Line
Now that you have your float and fishing line ready, here’s how to attach them:
Prepare Your Line: Start with a length of monofilament or fluorocarbon line, which is ideal for fly fishing. Tie a knot at the end of the line, leaving a sufficient length to attach the float.
Loop Knot: To create a loop at the end of the line, you can use a loop knot like the Palomar Knot or the Improved Clinch Knot. These knots are excellent for attaching the float securely.
Palomar Knot:
- Take about 6 inches of line and make a loop.
- Pass the end of the line through the loop, then back through the first loop.
- Cross the tag end over the main line and make a small loop.
- Pass the tag end through the small loop.
- Moisten the knot and pull both ends to tighten.
Improved Clinch Knot:

- Make a simple overhand knot with about 6 inches of line.
- Pass the tag end through the loop.
- Make another overhand knot about an inch away from the first one.
- Moisten the knot and pull both ends to tighten.
Attach the Float: Once the loop is secure, thread the float through the loop. Make sure the float is centered and the loop is not too tight or too loose.
Add the Leader: Cut a length of leader material, typically monofilament or fluorocarbon, that is appropriate for the fly you are using. Tie one end of the leader to the loop using a loop knot similar to the ones described above.
Attach the Fly: Finally, tie your fly to the end of the leader using the appropriate fly tying technique, such as the Improved Clinch Knot or the Grub Knot.
Tips for Success
- Practice: Like any skill, tying a float to your line takes practice. Don’t be discouraged if it doesn’t come right away.
- Patience: When adjusting the float and leader length, take your time to ensure a balanced setup.
- Quality Materials: Use high-quality fishing line and leader material to prevent breakage and improve your chances of catching fish.
- Safety First: Always check your knots to ensure they are secure before heading out on the water.
By mastering the technique of how to bind a float to your fishing line, you’ll be well on your way to becoming a proficient fly fisherman. Remember, the key to success lies in understanding the basics, choosing the right equipment, and practicing your technique. Happy fishing!


